ECNR Passport: Your Comprehensive Guide to Eligibility and Application in India
An Indian passport serves as a vital travel document, but did you know that there are different categories? For those seeking opportunities abroad for employment or education, understanding the nuances of an ECNR passport is crucial. This article serves as your comprehensive guide, detailing who is eligible for an ECNR passport, how to navigate the application process, and the advantages it offers. Whether you’re a student planning to study overseas or a professional seeking international career prospects, this information will empower you to understand and obtain the correct passport type.

Table of Contents
What Exactly is an ECNR Passport?
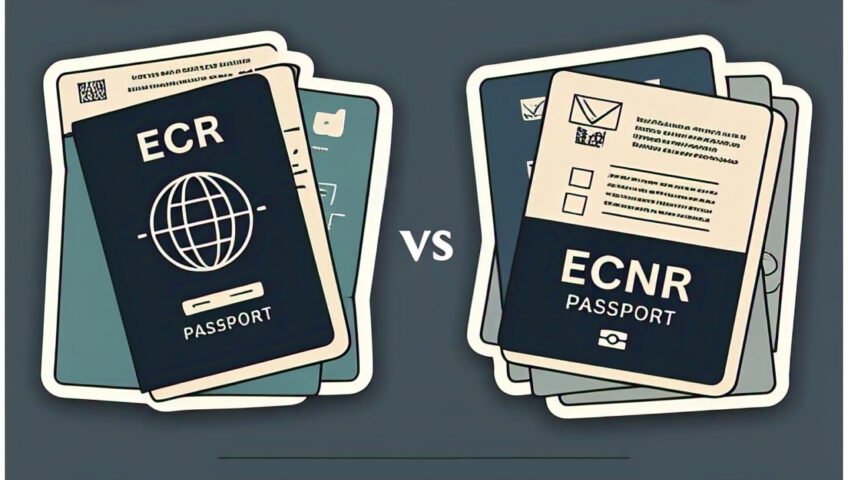
The term ECNR stands for Emigration Check Not Required. An ECNR passport is issued to Indian citizens who do not require an emigration check before traveling to certain countries for employment. This is in contrast to an ECR (Emigration Check Required) passport, which necessitates an emigration clearance from the Protector of Emigrants (POE) before the holder can travel to specific countries for work. The distinction is primarily based on the applicant’s educational qualifications and professional skills. Understanding this fundamental difference is the first step in ensuring a smooth international travel experience.
Who is Eligible for an ECNR Passport?
The eligibility criteria for an ECNR passport are clearly defined by the Government of India. If you fall into any of the following categories, you are generally eligible for an ECNR passport:
- Individuals who have passed the matriculation or higher secondary examination from a recognized board. This is the most common criterion. If you have completed your 10th grade or equivalent, or any higher level of education, you are likely eligible.
- Individuals possessing a two-year diploma from any recognized institution. Technical or vocational diplomas of at least two years in duration qualify for ECNR status.
- Individuals holding a degree from a recognized university. Any bachelor’s, master’s, or doctoral degree from a recognized university in India makes you eligible.
- Professionals such as doctors, engineers, chartered accountants, scientists, advocates, professors, journalists, etc. Individuals in recognized professional fields are typically granted ECNR status.
- Spouses and dependent children of individuals holding an ECNR passport. Immediate family members of ECNR passport holders may also be eligible.
- Individuals above the age of 50 years. Senior citizens are generally exempt from emigration checks.
- Individuals who have been staying abroad for more than three years. If you have resided in a foreign country for over three years, you are usually eligible for an ECNR passport.
- Government servants, their spouses, and dependent children. Employees of the government are typically issued ECNR passports.
- Seamen in possession of a Continuous Discharge Certificate (CDC). Individuals working in the merchant navy with a CDC are eligible.
- Individuals holding a permanent immigration visa to countries like the USA, UK, or Australia. If you have already obtained permanent residency in certain developed nations, you will likely receive an ECNR passport.
- Individuals paying income tax for more than three years. Regular income tax payers for a specified period may also be eligible.
It’s important to note that these are general guidelines, and the final decision rests with the passport issuing authority. For the most up-to-date and specific eligibility criteria, always refer to the official website of the Passport India portal.
Who is NOT Eligible for an ECNR Passport? (ECR Category)
Individuals who do not meet the criteria mentioned above generally fall under the ECR category. This typically includes individuals with lower levels of education (below matriculation) and those who are unskilled or semi-skilled laborers intending to work in certain specified countries. These individuals require emigration clearance from the Protector of Emigrants (POE) before they can travel for employment to these countries. The list of these countries can be found on the Ministry of External Affairs website.
Benefits of Holding an ECNR Passport
Having an ECNR passport offers several advantages, primarily related to ease of international travel for employment and education:
- No Emigration Check Required: The most significant benefit is the exemption from the mandatory emigration check required for ECR passport holders traveling to certain countries for work. This saves time and streamlines the travel process.
- Direct Travel: ECNR passport holders can travel directly to their destination country without needing to go through the Protector of Emigrants (POE) for clearance.
- Wider Range of Job Opportunities: Many higher-skilled and professional job opportunities abroad require an ECNR passport.
- Easier Visa Processing: In some cases, having an ECNR passport might simplify the visa application process for certain countries.
- Convenience for Students: Students going abroad for higher education are typically eligible for ECNR, making their travel arrangements smoother.
How to Apply for an ECNR Passport
The process of applying for an ECNR passport is similar to applying for a regular Indian passport. You can choose to apply either online or offline. The online method is generally preferred for its convenience and efficiency.
Online Application Process:
- Visit the Passport India Portal: Go to the official website of the Passport India portal.
- Register: If you are a new user, register on the portal by clicking on the “New User? Register Now” link.
- Login: If you are a registered user, log in using your credentials.
- Apply for Passport: Click on the “Apply for Fresh Passport/Re-issue of Passport” link.
- Choose Application Type: Select the option for a fresh passport and choose the type of service as “Normal” or “Tatkaal” based on your urgency.
- Fill in the Application Form: Carefully fill in all the required details in the online application form. Ensure all information is accurate as per your documents.
- Upload Documents: Upload scanned copies of the necessary documents as specified. The required documents will vary based on your eligibility criteria (e.g., educational certificates).
- Pay Application Fee: Pay the applicable passport application fee online through various available payment methods like net banking, credit/debit card, or UPI. You can find the current fee structure on the Passport India website.
- Schedule Appointment: After successful payment, schedule an appointment at the nearest Passport Seva Kendra (PSK), Post Office Passport Seva Kendra (POPSK), or Regional Passport Office (RPO). Choose a date and time slot that is convenient for you.
- Visit PSK/POPSK/RPO: On the scheduled date and time, visit the chosen center with the original documents and their self-attested photocopies for verification.
Offline Application Process (Limited Availability):
While the online process is encouraged, you can still apply offline in some cases.
- Download Application Form: Download the passport application form from the Passport India website.
- Fill the Form: Fill in all the details accurately using a blue or black ballpoint pen.
- Attach Documents: Attach self-attested photocopies of the required documents.
- Pay Application Fee: Pay the application fee through a demand draft in favor of the “Pay and Accounts Officer, Ministry of External Affairs.”
- Submit Application: Submit the completed application form along with the documents and fee receipt at the designated Passport Seva Kendra (PSK) or Regional Passport Office (RPO). You might need to schedule an appointment beforehand, so check the guidelines on the Passport India website.
Documents Required for ECNR Passport Application
The list of documents required for an ECNR passport application can vary slightly depending on your specific eligibility criteria. However, some common documents include:
- Proof of Address: Aadhaar card, Voter ID, electricity bill, water bill, telephone bill, bank statement, etc.
- Proof of Date of Birth: Birth certificate, school leaving certificate, matriculation certificate.
- Educational Certificates: Mark sheets and certificates of your highest educational qualification (e.g., matriculation, higher secondary, diploma, degree). These are crucial for establishing ECNR eligibility.
- Passport Size Photographs: As per the specifications mentioned on the Passport India website.
- Other Supporting Documents: Depending on your specific situation (e.g., marriage certificate, divorce decree, affidavit for change of name, etc.).
It is essential to check the “Documents Required” section on the Passport India website for the most accurate and up-to-date list based on your individual circumstances. You might also need to provide an affidavit stating that you are eligible for an ECNR passport based on your qualifications. You can find sample affidavit formats on the Passport India website.
Processing Time and Fees
The processing time for an ECNR passport can vary depending on factors such as the volume of applications, the verification process, and whether you choose the normal or Tatkaal (expedited) service. Generally, it can take anywhere from a few weeks to a couple of months. The Tatkaal scheme offers faster processing, usually within a few working days, but it comes with a higher application fee. The exact fee structure for different passport services is available on the Passport India website under the “Fee Calculator” section.
ECNR Endorsement on Existing Passport
According to the information found in the search result, endorsements are not allowed for a change in status from ECR to non-ECR (ECNR). In such cases, a new passport has to be issued. Therefore, if you currently hold an ECR passport and have become eligible for ECNR status (e.g., after completing your matriculation), you will need to apply for a re-issue of your passport with the ECNR status. You would follow a similar application process as for a fresh passport, selecting the “Re-issue of Passport” option and providing the necessary documents to prove your ECNR eligibility.
Common Mistakes to Avoid During Application
Applying for an ECNR passport is a significant process, and avoiding common mistakes can save you time and hassle:
- Providing Incorrect Information: Double-check all the information you enter in the application form. Any discrepancies can lead to delays or rejection.
- Uploading Unclear or Incorrect Documents: Ensure that the scanned copies of your documents are clear, legible, and meet the specified size and format requirements.
- Not Providing Sufficient Proof of ECNR Eligibility: If you are applying for ECNR based on your education or profession, make sure to upload the relevant certificates and documents.
- Missing the Appointment: If you are unable to attend your scheduled appointment at the PSK/POPSK/RPO, you may need to reschedule, which can cause delays.
- Not Carrying Original Documents: Remember to carry the original documents for verification along with their self-attested photocopies on the day of your appointment.
- Submitting an Incomplete Application: Ensure that you have filled in all the mandatory fields in the application form and uploaded all the required documents.
By being careful and following the guidelines provided on the Passport India website, you can ensure a smooth and successful ECNR passport application process.
Conclusion: Empowering Your International Journey
Obtaining an ECNR passport is a crucial step for Indian citizens planning to travel abroad for employment, education, or other purposes where an emigration check is not required. By understanding the eligibility criteria, navigating the application process carefully, and avoiding common mistakes, you can secure this essential travel document and embark on your international journey with confidence. Always refer to the official Passport India website for the most accurate and up-to-date information.
Disclaimer: This article provides general information about ECNR passports and the application process in India based on available information up to the current date. For the most accurate and up-to-date guidelines, please refer to the official website of the Passport India portal. The information provided here should not be considered legal or professional advice.
Affiliate Disclosure: Please note that some links in this article may be affiliate links. This helps us to continue providing valuable content to our readers.
Related Topics You Might Find Interesting:
- Applying for a First-Time Indian Passport
- Passport Renewal Process in India
- Difference Between ECR and ECNR Passports
- Emigration Clearance for ECR Passport Holders
- Documents Required for Indian Passport Application
FAQ on ECNR Passports:
- Q: What is the full form of ECNR?
- A: Emigration Check Not Required.
- Q: Who needs an ECNR passport?
- A: Indian citizens who are eligible based on their educational qualifications, profession, age, or other criteria and who do not require an emigration check for employment in certain countries.
- Q: Can I convert my ECR passport to ECNR?
- A: According to the search result, you cannot get an endorsement. You will need to apply for a re-issue of your passport with the ECNR status.
- Q: What is the validity of an ECNR passport?
- A: The standard validity of an Indian passport, including ECNR passports, is typically 10 years from the date of issue.
- Q: Is an ECNR passport required for tourism?
- A: Generally, for tourism purposes, the ECR/ECNR status doesn’t have a direct impact. However, it’s always good to have an ECNR passport if you are eligible, as it provides more flexibility for future travel.
- Q: Where can I apply for an ECNR passport?
- A: You can apply online through the Passport India portal or offline at designated Passport Seva Kendras (PSKs) or Regional Passport Offices (RPOs).